🎁 Free 30-day publishing fees on Pay-As-You-GO. Get 15% off when recruiting from the UserQ Panel, with code HELLO15

Want to gain valuable insights into what users think and feel about your digital product? Here at UserQ, we’ve got a whole host of user research tools, including one of our most popular data-gathering methods: surveys.
So why are surveys so beneficial for getting useful feedback on your brand or digital product? And how do you build a top-quality survey with our easy-to-use platform?
In this guide, we’ve written a comprehensive tutorial on how to create, run, and analyse a survey using our platform.
What is a survey?
A user research survey is a set of pre-determined questions designed to grasp the nature of user opinions, values and attitudes. This helps you find out exactly what users think about your website or app, who they are as consumers, and what you can do to better meet their needs, desires, opinions, and behaviours.
You can also use surveys for product strategy (in other words, before you even start to build your website or app). So instead of getting feedback on your existing digital products, you can use surveys to find out more about your audience, including their interests, knowledge, likes, dislikes, pain points, and more.
For example, if you’re planning on building a new app to sell your products, you can ask participants about specific pain points they experience when shopping on their phones. Once you know what bugs them, you can then use the information to build a product around their specific needs. It’s all about getting personalised consumer feedback to give you the insights needed to tailor your brand and its products around their critiques and comments.
Hearing individual opinions – whether positive or negative, allows you to better understand the audience you’re targeting and discover useful things about what they want and need from you. Introducing surveys in the early stages of projects also allows your development team to work with real data and not just rely on assumptions.
What does a survey involve?
Our UserQ surveys are super simple. You have the chance to ask both open and closed-style questions that produce a healthy mix of both qualitative and quantitative data. There are six types of questions you can choose to build with our UserQ platform: Free text, Single choice, Multiple-choice, Likert scale, Rating scale, and Ranking scale (but we’ll explain these more in step 4 of our how-to guide, below).
Best of all, surveys are versatile research tools that are quick and easy to carry out – especially when you already know what answers you need to inform your plan of action moving forward. We’re big believers that the best questions come when you have a clear objective on what you want the survey to achieve. You want the results of your survey to be genuinely useful, so make sure you use the right set of questions that find out exactly what you need to know.
With our panel of willing survey respondents, you’ll get open and honest answers that provide constructive and dependable user research data.
Think of surveys as a method of investigation which you can use to: enhance the user experience of your digital products, learn more about a specific process, and enrich your own understanding of who your target audience is and what they like/dislike.
Here are a few tips to keep in mind when coming up with your questions:
- Don’t ask too many. We recommend sticking to one concept per question.
- Be clear and concise. Watch your wording and avoid technical jargon that users might not understand.
- Keep your question length to a minimum. Think short and straightforward.
- Ask a mix of questions. Use qualitative and quantitative-based questions, including text-based and multi-choice questions.
- Keep language neutral and your multi-choice options balanced. You don’t want to skew responses with unconscious bias.
How to create and run a UserQ survey
Now that we’ve explained exactly what a survey is, it’s time to create yours…
Step 1: create a new survey
From your personal dashboard, click ‘Create new test’ and then ‘Survey’.
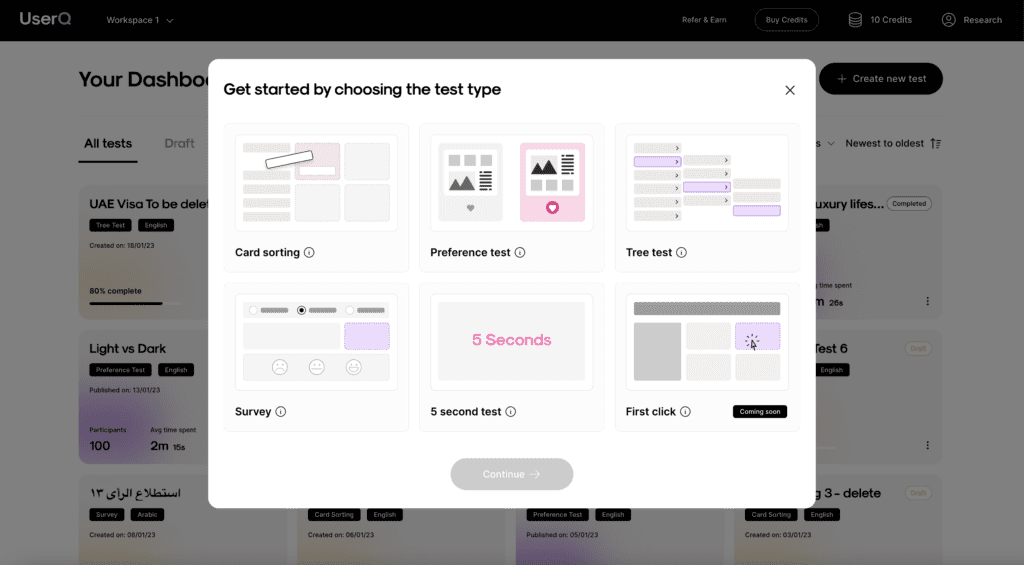
Select your test language (English or Arabic) and name your new test. While the researcher platform will not show in Arabic, the entire participant experience will be Arabic-friendly (from right to left).
Tip: make sure the test name is appropriate for participants to see.
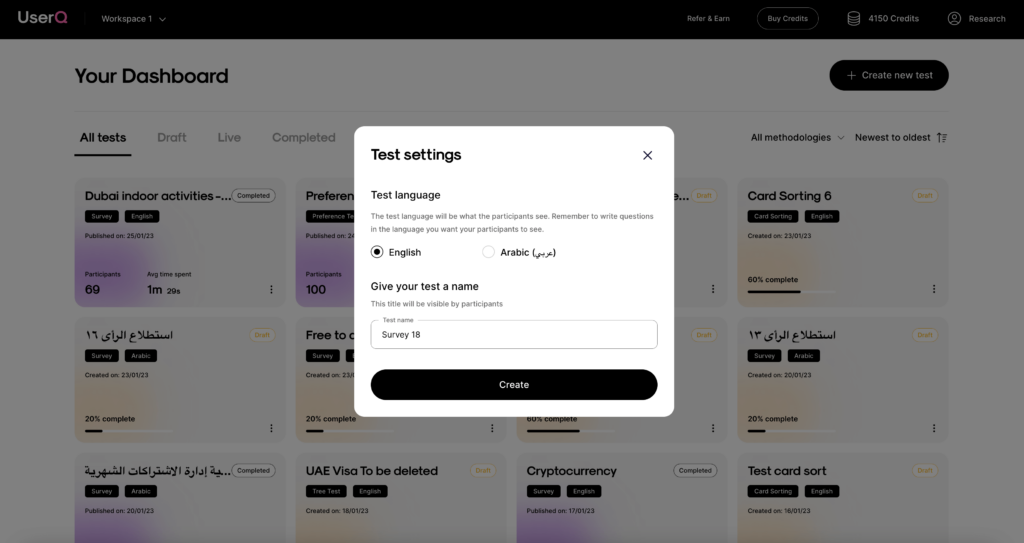
Step 2: create and edit your welcome page
A great opportunity to introduce your participants to the survey they’re about to take.
A default title and description are already pre-populated. You have two choices: to proceed without making any changes to the generic text, or personalise your own…
- Add a custom welcome page title and write a message.
- Add a welcome page photo – they act as a visual cue for what the survey is about.
- If the language is set to Arabic, the pre-populated text will be translated into Arabic too, so remember to write in Arabic if you want to make changes.
Tip: be friendly and make your participants feel at ease. This is a chance to clarify what your survey is about and what’s expected of them.
Step 3: add introductory questions (optional)
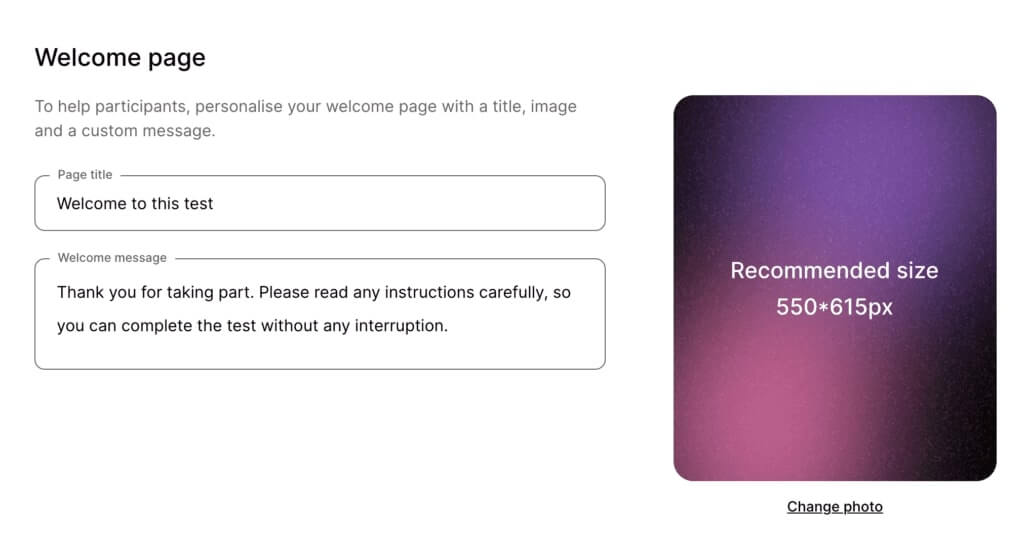
Before participants get into the main bulk of survey questions, you also have the option to write some pre-test introductory questions. It’s down to you whether you want to add them or not.
- Customise up to five pre-test questions.
There are six types of questions you can choose from: Free text, Single choice, Multiple-choice, Likert scale, Rating scale, and Ranking scale.
Step 4: write your survey questions
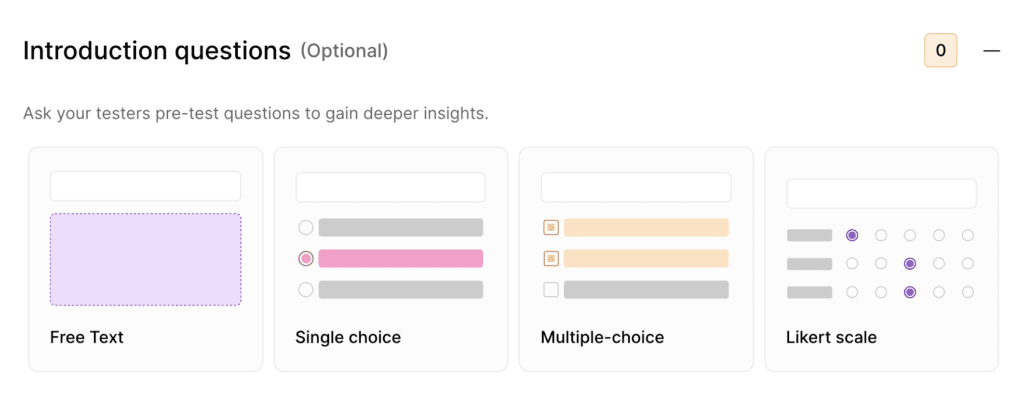
Under the ‘Survey builder’ tab, you can add a maximum of 50 questions.
Tip: Use a reasonable number of questions. Beware participants can take anywhere between 30 seconds and 1 minute to answer one single close-ended question (it’s even longer for an open-ended style question). So keep this in mind when deciding how many questions you want to add. The longer your test takes, the more likely participants will abandon the survey before completion.
To write your survey questions, it’s pretty simple: you will build each question one by one, starting with question 1. To add another question, simply press ‘Add question’…
Let’s look at each question type in more detail…
a. Free text
These questions ask participants to freely write out one answer in a text box. They’re great for getting in-depth and personalised responses.
You could ask: ‘Tell us about a time you received positive customer service online.’
- Write your question in the ‘Your question’ box.
- Decide whether you want to make the question optional. This means the user is allowed to skip the question. If you don’t make a question optional, the user will be required to answer the question and can’t proceed without doing so. This goes for any of your questions.
- Press save.

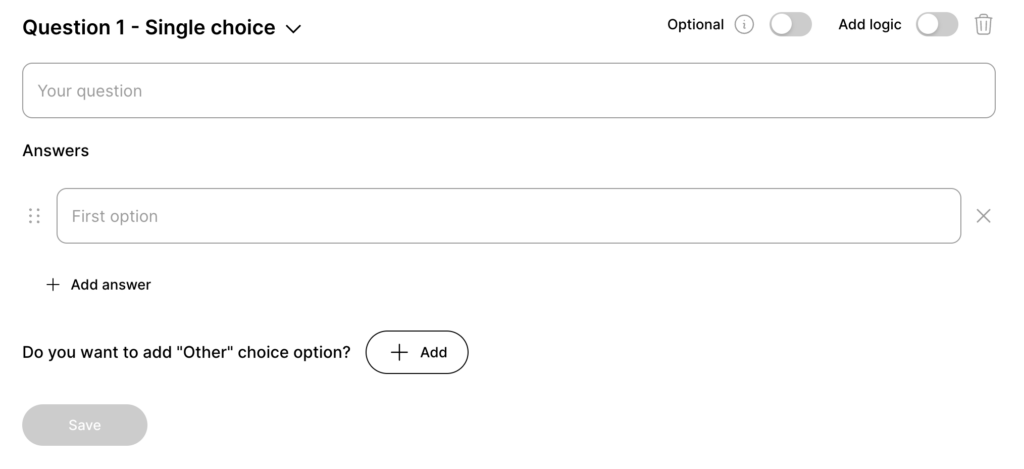
b. Single choice
These questions ask participants to answer by selecting just one of the multiple options.
You could ask: ‘How long would you approximately spend doing…’
0 – 10 seconds
30 seconds to 1 minute
1 to 2 minutes
2 minutes +
- Write your question in the ‘Your question’ box.
- Add answers by writing them in the option boxes: First option, Second option, and so on.
- Add the possibility of answering ‘Other’ (this means participants will be given a text box to specify their answer).
- Press save.
Tip: You can automatically lead participants elsewhere in the survey by switching the ‘Add logic’ tab and selecting one of the ‘Jump to’ drop-down options, including ‘End survey’, ‘Next Question’, or any other specific question number.
End survey = When selected, the test ends – irrespective of the number of questions to follow.
Next question = When selected, the participant will be shown the next question in the queue.
Question 3, 4 or so on = When selected, the participant will be shown the respective question.
Tip: Create all questions first and add any logics as a last step to avoid confusion. Remember, when adding a logic, you can only select specific questions coming after the one you are working on (this is to avoid dead ends and repetitions).
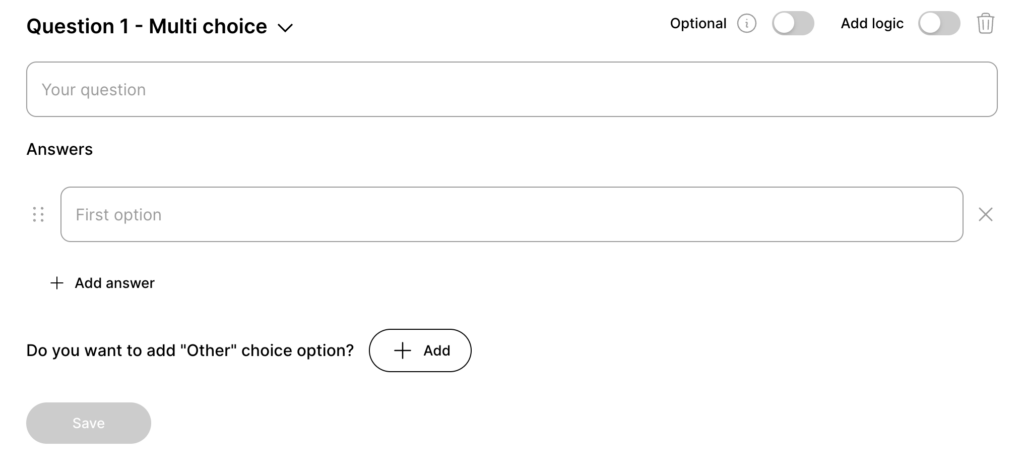
c. Multi-choice
These questions ask participants to select multiple choices in their answers – meaning they’re not constricted to responding with just one answer. They can tick as many as see relevant.
You could ask: ‘What do like the design of? Select any that are relevant.’
Home page
About page
Products and services
Contact us
- Write your question in the ‘Your question’ box.
- Add answers by writing them in the option boxes: First option, Second option, and so on.
- Add the possibility of answering ‘Other’ (this means participants will be given a text box to specify their answer).
- Press save.
Tip: watch out for error messages that may appear on the builder page as you write your survey questions. Here are a few:
‘Please add survey questions.’
(when no questions have been added and you’re trying to move through the survey builder)
‘You missed some key information. Please check again and fill out any missing fields.’ (when you’ve added a question but failed to enter the question/answer fields)
‘Your answer is empty – please enter an option.’
(when the value option added is blank)
‘Questions require at least two options.’
(when you’ve added fewer than two options on your single/multi-choice quesiton)
‘At least one question should not be optional.’
(when you’ve made all questions optional)
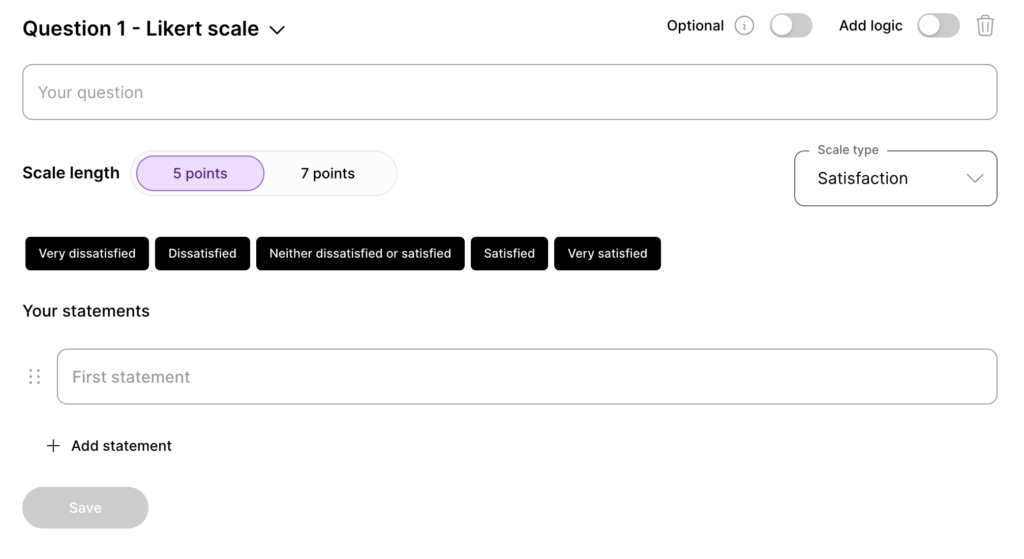
d. Likert scale
These questions ask participants to decide their level of agreement with certain statements using a 5 or 7 point scale. They can also measure other types of variations including frequency, appropriateness, satisfaction, reflective of me, priority, quality, level of difficulty, quality, and importance, and more.
- Write your question in the ‘Your question’ box. For example, ‘How much do you agree with the statements below?’
- Decide your scale length: five or seven points.
- Choose your scale type in the ‘Scale type’ drop-down box.
- Write your statement in the ‘Your statements’ box.
- Press save.
Depending on what specific things you want feedback on, you should choose a scale type that best fits the question you’re asking. Here’s a closer look at the 7 point rating scales for each scale type.
Agreement
You could ask: ‘How much do you agree with the following statements?’
Strongly disagree > Disagree > Somewhat disagree > Neither agree or disagree > Somewhat agree > Agree > Strongly agree
Frequency
You could ask: ‘When browsing a website, how often do you do the following?’
Never > Rarely (less than 10% of the time) > Occasionally (about 30% of the time) > Sometimes (about 50% of the time) > Frequently (about 70% of the time) > Usually (about 90% of the time) > Every time

Appropriateness
You could ask: ‘How appropriate did you find …’
Absolutely inappropriate > Inappropriate > Slightly inappropriate > Neutral > Slightly appropriate > Appropriate > Absolutely appropriate

Satisfaction
You could ask: ‘How satisfied are you with…’
Very dissatisfied > Dissatisfied> Slightly dissatisfied> Neutral > Slightly satisfied > Satisfied > Very satisfied

Reflective of me
You could ask: ‘How reflective are the following shopping behaviours of you?’
Very untrue of me > Untrue of me > Somewhat untrue of me > Neutral > Somewhat true of me > True of me > Very true of me

Level of difficulty
You could ask: ‘How easy or difficult was it too…’
Very easy > Easy > Somewhat easy > Neutral > Somewhat hard > Hard > Very hard

Priority
You could ask: ‘How much of a priority is … in your daily life schedule?’
Not a priority > Low priority > Somewhat a priority> Neutral > Moderate priority > High priority > Essential priority

Quality
You could ask: ‘How would you rate the quality of the service…’
Very poor > Poor > Below average > Average > Above average > Good > Excellent

Importance
You could ask: ‘How important do you find … when buying a new smartphone’
Very unimportant > Unimportant > Slightly unimportant > Neutral > Slightly important > Important > Very important

e. Rating scale
A rating scale is a type of closed-ended question used to find out how participants rank a certain feature or attribute. For example, you could ask: ‘How happy are you with Dubai weather?’ or ‘How would you rate this product?’
- Decide your scale length: 5, 7 or 10 points.
- Decide your scale type: numerical, emoticons, or stars.
- Write your question in the ‘Your question’ box.
- Choose your scale type by choosing an option in the ‘Scale type’ drop-down box.
- Press save.
Here’s what each scale type will look like for your participants:
Numerical

Emoticons
Stars

f. Ranking scale
These questions ask participants to rank items in terms of importance or satisfaction. They’ll do so by dragging items and reordering them in a numerical ranking.
For example, you might ask them to rank certain pages, products, or design aspects that they find to be most important to least important.
Here’s what the ranking scale will look like for participants:
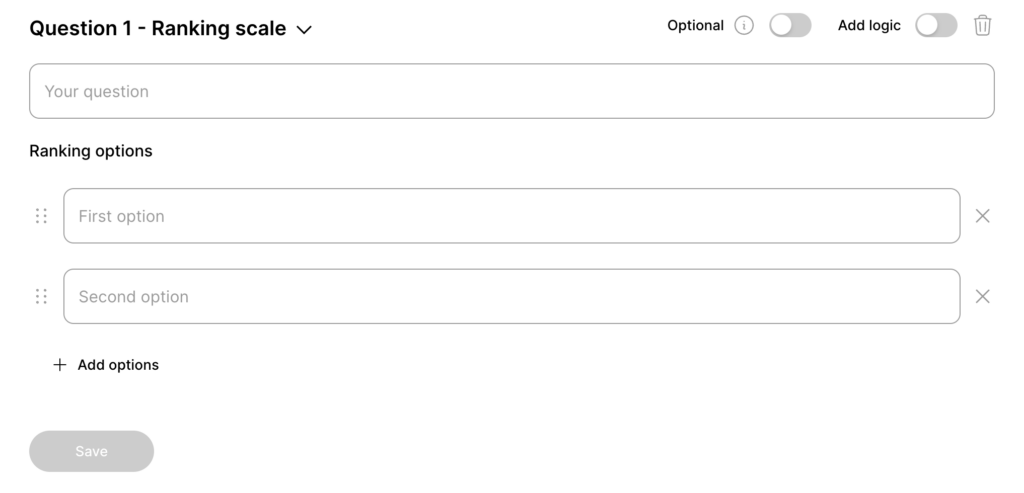
- Write your question in the ‘Your question’ box.
- Write your items in the ‘Please enter an option box’.
- Press save.
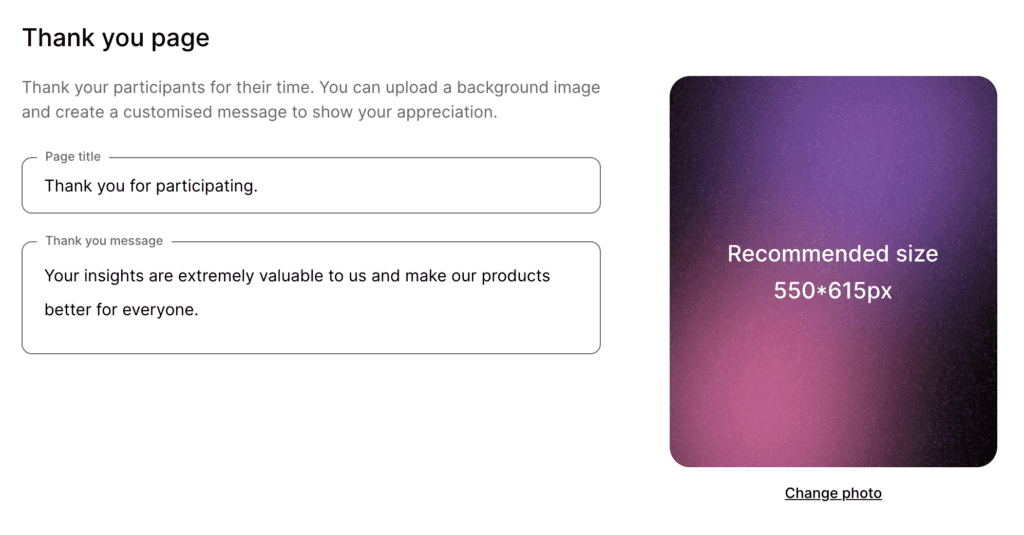
Step 5: edit your thank you page
Finish up your survey by editing the thank you page.
- Customise your page title, and write a personalised thank you message.
- Add a custom photo.
Step 6: Recruit your participants
Once the survey questions have been written, it’s time to publish it. Start by finding participants…
You can either choose to recruit from UserQ panel or share the link with your own participants.
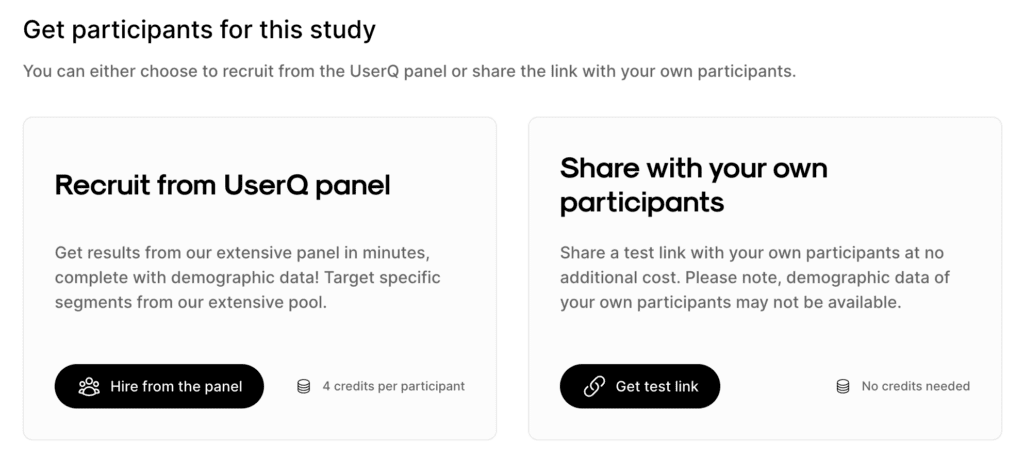
a. Recruit from UserQ panel
If you want to use your own participants, skip to step b.
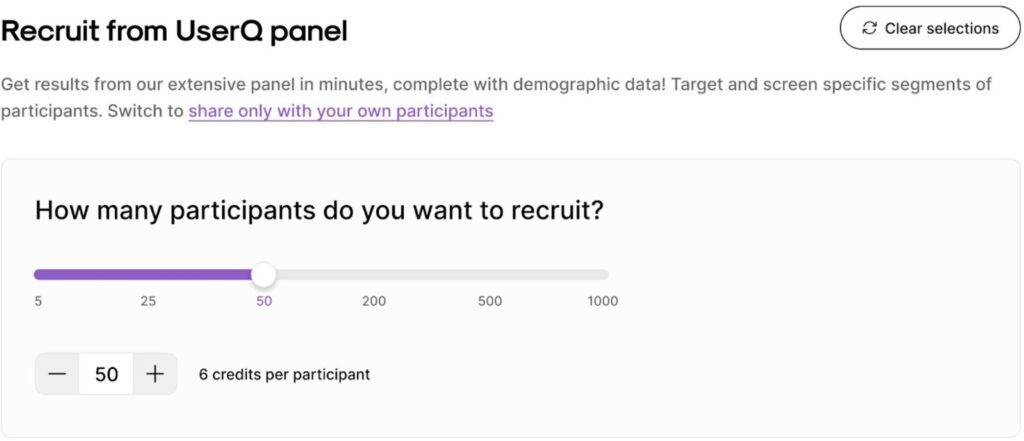
- Click ‘Hire from the panel’.
- Choose how many participants you want to recruit by using the slider or the input field.
i. Filter by demographics
Next, switch on the demographic filtering feature, where you can target participants from a variety of demographics, including age, gender, nationality, etc. Use our estimated panel size widget (on the right) for real-time information on how many testers we have in our pool, based on your selected demographics. It also provides feedback on your survey’s results speed, ie. how long you’ll have to wait to get all the results.
The broader the panel, the faster the results come in.
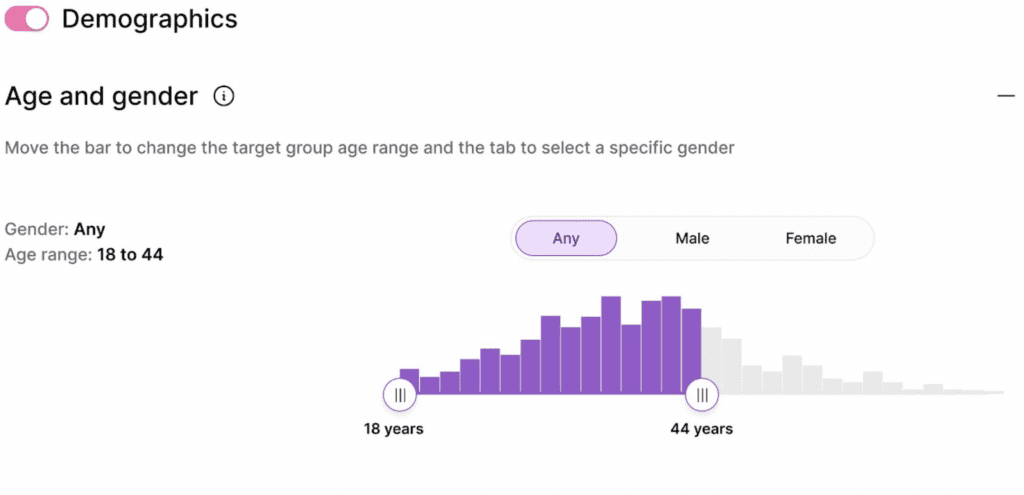
Bonus tip: customise your participant pool to the target market of your digital product. For example, if you’re creating a survey for an online bakery that operates solely in Dubai, you’ll likely get the best, most valid results if you select participants who reside in the city itself.
ii. Add screening questions (optional)
Toggle this option, to add screening questions to your study. These questions will appear one-by-one to the tester as ‘pre-test questions’. Their responses will determine whether they are eligible to continue to the study.
You can add up to a maximum of 3, single-choice questions to identify the most suitable participants for your study. Each question can have a maximum of 5 responses and must be classified as either a good fit or no fit.
Good fit = Responses that match your criteria for the study and are eligible to take the test or continue on to the next question (in the case of multiple screener questions). Your credits will be spent only on the “Good fit” participants.
Not fit = Response that are not a good fit for the study and the tester will not be able to access the test.
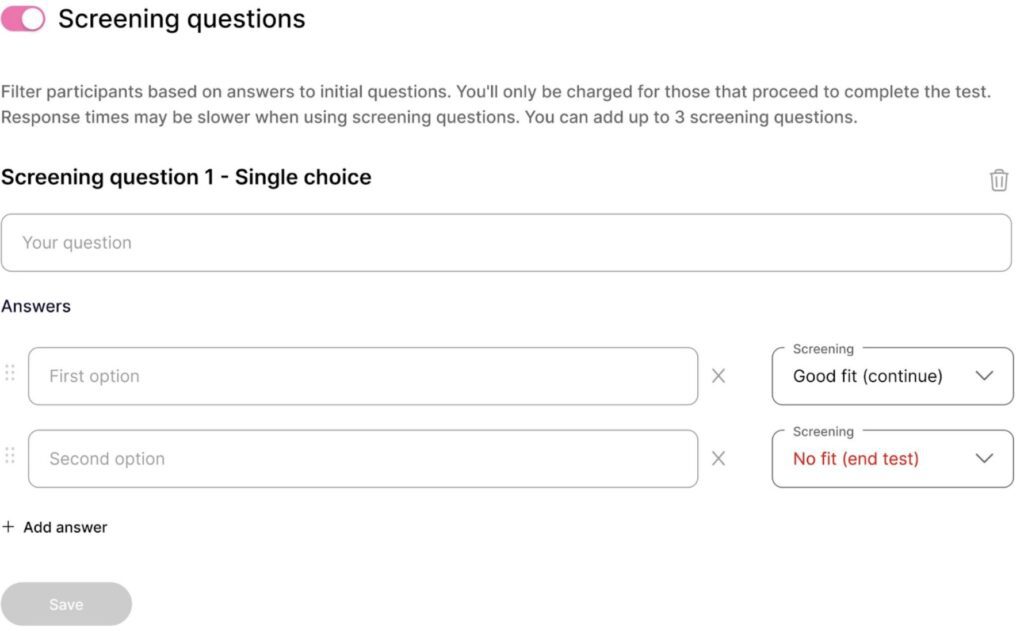
Bonus tip: Identify your target audience by asking them pre-test questions. For example, if you’re creating a survey for a car company operating in the UAE, add screener questions to your study like, “Do you have a valid UAE driver’s license?” or “Do you own a car?”. This ensures that the data collected is relevant to your research and enables you to make informed decisions.
b. Share with your own set of participants
You can share the link with your own testers panel at no extra cost. However, we recommend recruiting from our UserQ panel as you’ll get full use of our wide-reaching participant demographic data, including age, gender, nationality, residency, confidence with technology, employment status, and household status. By using this data, there’ll be no need for you to ask demographic questions in the survey itself.
Step 7: publish your survey
- Review your order summary (including your total participants and required credits for recruitment and publishing fee).
- In the case of an outstanding credit balance, you’ll need to process a payment.
- Once everything’s set up how you want it, click ‘Publish’.
Tip: apply a promo code if you’ve got one.
Congratulations, your survey is now live.
You’ll get a shareable link for the test, no matter whether you’ve selected a UserQ panel or have chosen your own participants only.
Build your UserQ survey today
Ready to build your survey with us? Join as a researcher and the consumer feedback you need will soon start rolling in.
Need some assistance with building your survey questions? Send a message to: support@userq.com to get in touch. We’re always happy to answer any queries you might have.
Related Post

Tree testing guide: How to
Want to build a fully functional tree test the easy way? Here at UserQ, we’ve got the tools you need

Tree testing guide: Analyse tree
You’ll have access to the results as soon as the tree test is published. The findings of your test show

Card sorting guide: How to
Want to build simple and easy-to-use card sorting tests? You can with UserQ. Our pay-as-you-go user testing platform allows you
Subscribe to our
product newsletter!
Receive emails about UserQ updates, new features,
offers and latest trends.


