🎁 Free 30-day publishing fees on Pay-As-You-GO. Get 15% off when recruiting from the UserQ Panel, with code HELLO15

Want to build a fully functional tree test the easy way? Here at UserQ, we’ve got the tools you need to get insightful, digestible data from simple-to-set-up tree tests. You’ll be levelling up your brand’s digital experiences in no time.
But what is a tree test? What are they used for? And why is UserQ the best place for creating high-quality remote tests for the MENA region, like tree tests?
In this how-to guide, we provide a step-by-step tutorial on how to create, run, and analyse a tree test using our platform.
What is a tree test?
A tree test is a type of user research tool that evaluates the findability of certain topics and pages on your website information architecture (how your website content is organised and labelled). In other words, tree tests show how easy it is for users to navigate your site and find the stuff they need when browsing it.
Tree testing answers questions like:
- Is my website content grouped coherently?
- Are my website pages labelled clearly and logically?
- Can users find the information they need quickly and easily? If not, why not?
Tree tests are most commonly used for evaluating websites, however, they’re also super effective for apps. By analysing the data collected from a tree test, you can identify certain pain points of your website/app and improve its information architecture – according to what users found easy and difficult.
Tree tests are also an effective way of obtaining results specific to certain demographics. Based on the tester panel that you create, our tree test platform will give you results that take a variety of cultural and language considerations into account.
Tip: we recommend carrying out tree tests early on in the design process to maximise the time available for you to make any necessary changes and edits to your digital product.
What does a tree test involve?
Tree testing is split into two main components: the tree and the tasks.
The tree is essentially just a text-only version of your website site architecture…it’s what participants will first look at and attempt to navigate.
The tasks are questions you set for your participants, based on their navigation of your tree ie. Where can you find our contact information?
Let’s say you’re an online store selling furniture: you might task participants with where to find leather sofas. Or if you’re a video streaming service, you could task participants with where to upgrade their subscription to HD.
Tip: set your test objectives before creating your tree and writing up your questions. Decide what it is you’re testing and think about what your goals are:
- Do you want to test your whole site or just a section of it?
- Are there any specific pain points you’re already aware of?
- Do you want to improve navigation for a specific demographic of users?
- Do you want to label your site pages more clearly?
- Do you want to completely redesign your website architecture or just make a few tweaks?
How to create and run a UserQ tree test
Now that you’ve set some goals, it’s time to create your tree test…
Step 1: create a new test
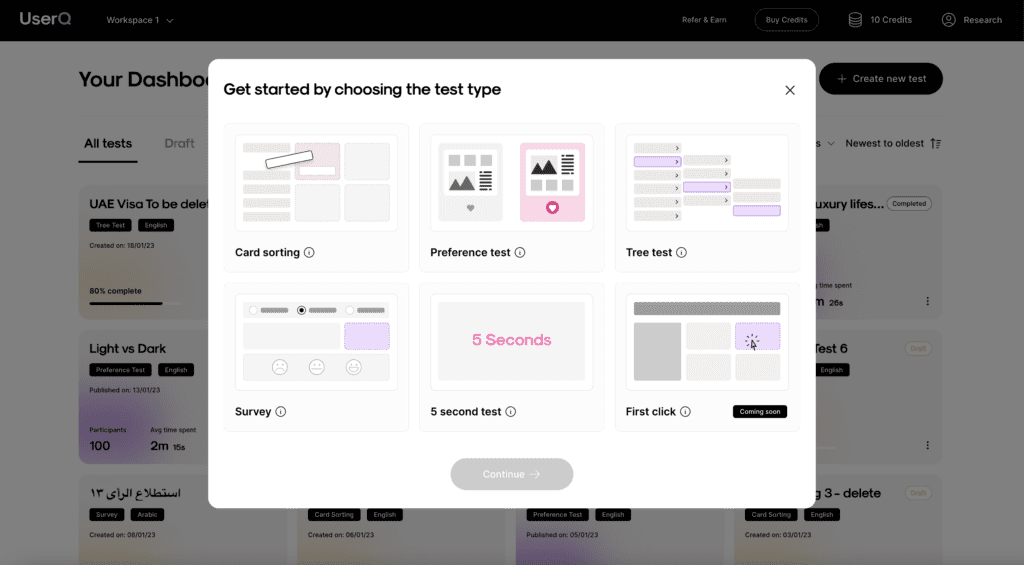
From your personal dashboard, click ‘Create new test’ and then ‘Tree test’.
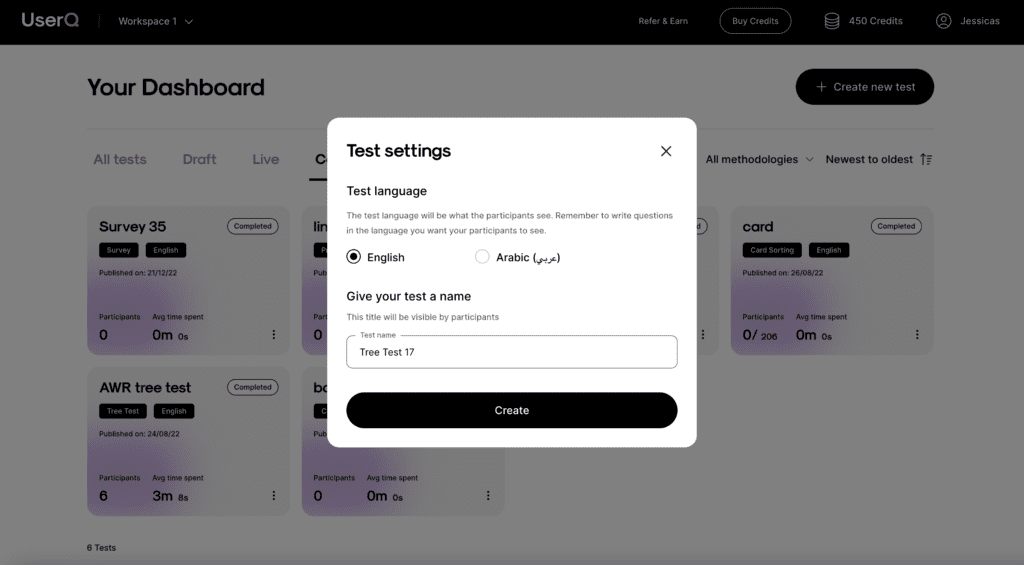
Select your test language (English or Arabic) and name your new test. Beware that whilst the researcher platform will not show in Arabic, the entire participant experience will be Arabic-friendly (from right to left). Therefore, if you do choose Arabic, remember to switch your keyboard to Arabic and make sure that all your test inputs are written correctly, including your tree test labels and question tasks (more on those soon).
Tip: remember, your test name is visible to participants. Make it appropriate.
Step 2: edit your welcome page
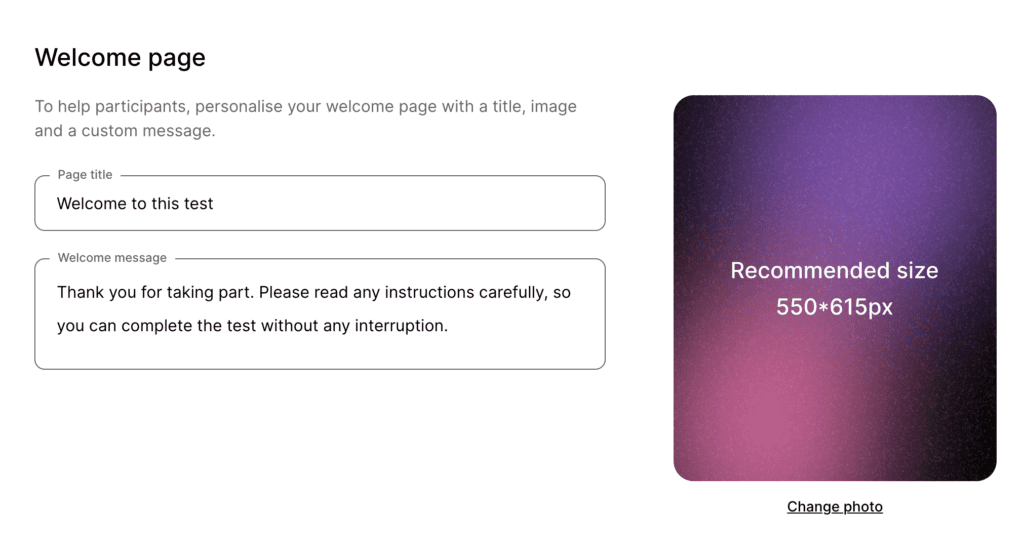
This is your chance to introduce participants to the tree test they’re about to take part in.
By default, a generic title and description are already prepopulated. You can choose to proceed without making any changes to them, or personalise your own…
- Add a welcome page title, and write a custom welcome message.
- Personalise the welcome page with a photo to give the user visual cues about the topic.
- If the language is set to Arabic, the prepopulated text will already be translated into Arabic too – so remember to write in Arabic if you want to make changes.
Tip: make your participants feel at ease – clarify test details before it begins.
Step 3: add introductory questions (optional)
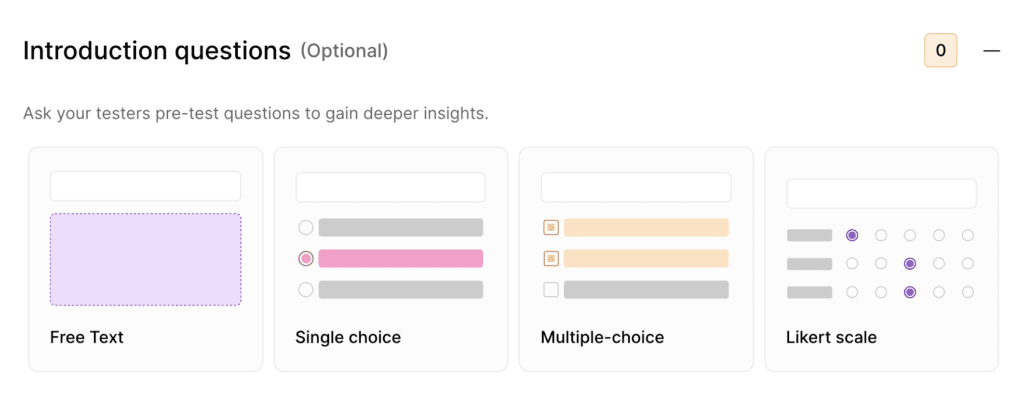
Pre-test questions help you gain deeper insights into who your participants are, and what they think about your website architecture.
- Add custom questions that you want to ask participants before the tree test task. They can be used to explore more about how they are confident with the topic of the test.
- There are four types of questions you can choose from:
Free text, Single choice, Multiple-choice, and Likert scale.
- You can add up to five introduction questions. We’ve set this maximum because we don’t want your participants to lose attention before the test event starts!
Step 4: build your tree
The test builder is the main content for your tree test.
a. Download CSV template (optional)
Instead of building the tree manually via our platform, you can choose to import a CSV/TXT file. To do so, you can download the CSV template provided on the platform, or import your own file.
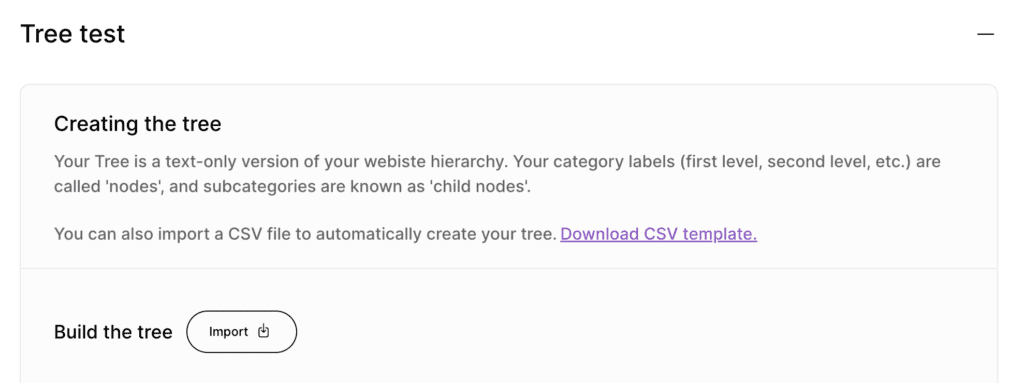
Before initiating the import process, please ensure that your file meets the following criteria:
- File Format: Please ensure that the file you upload is in either CSV format.
- Blank Rows/Columns: Avoid blank rows or columns in the file, as they can prevent the import of subsequent nodes and child nodes.
- Child Node Level Limit: Keep the number of levels below each child node to a maximum of 5.
If you want to build the tree from scratch instead, please follow the instructions provided below in Step b…
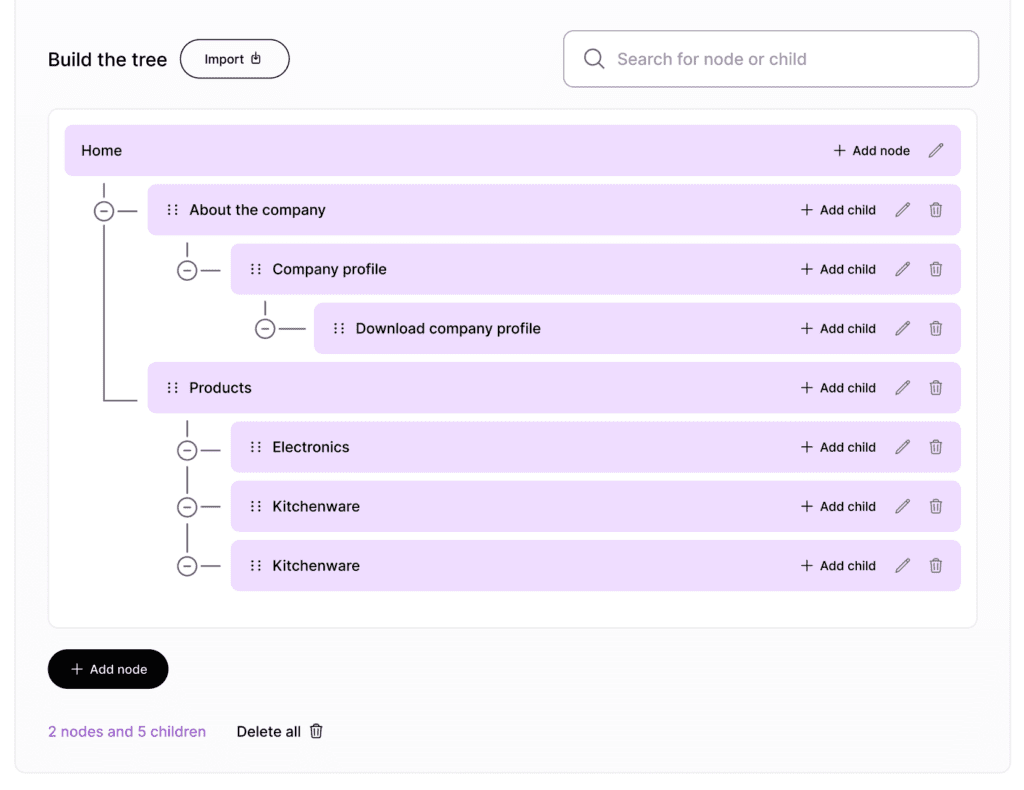
b. Add and build your category labels
Your category labels (first level, second level, etc.) are called ‘nodes’, and subcategories are known as ‘child nodes’. These represent the site pages and categories that your participants will navigate during the tree test.
- Your home page is a first-level node by default.
- Add and build your category levels according to your website page structure.
- You can build a maximum of five levels.
- Tip: make your label titles as clear and coherent as possible. They’re what your participants will be tasked with finding. Try to avoid giving the exact answer in the tree. For example, if you want your user to find “red apples”, the last level should be “apples”, not “red apples”.
To give an example of what you might label your nodes, let’s imagine we’re an online supermarket selling fruits and vegetables. Our category labels might look something like this:
Tip: preview your test along the way by clicking on the ‘Preview text’ button – then you know exactly what your participants see.
Step 5: create tasks
Next you should create the tasks that participants will take part in, ie. the questions they’re asked about how to navigate your site, and what destinations they need to get to.
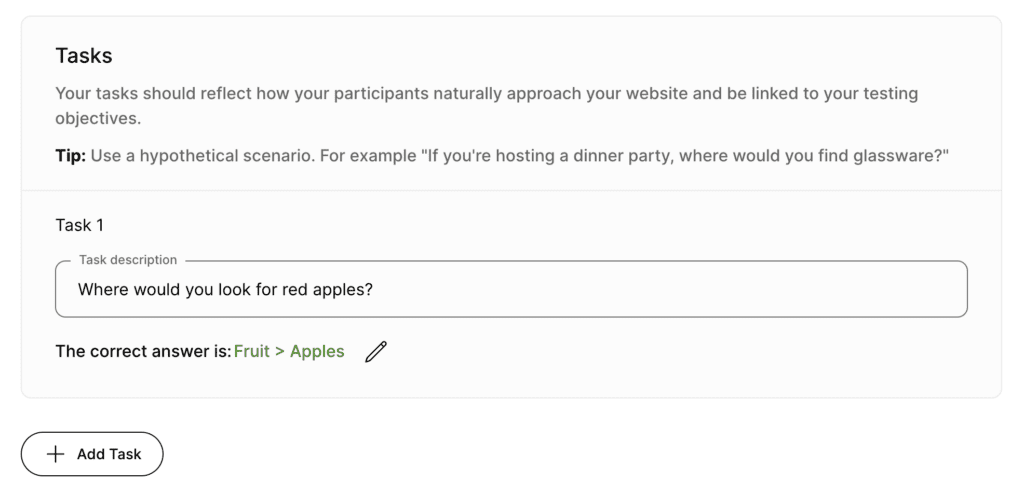
Your tasks should reflect how your participants would naturally use your website and be linked to your testing objectives.
- Create as many tasks as you feel necessary using the ‘Add task’ button.
- Write out the question in the ‘Task’ description.
- Define the correct answer by selecting the correct node/child label.
Tip: use hypothetical scenario-style questions. For example, ‘If you’re making an apple pie, where would you find red apples?
Bonus tip: We recommend adding more than 7 – 10 tasks to avoid the participant getting tired, bored or lost and abandoning the test.
The answer to the above question might be something like:
‘Fruit > apples’
Step 6: create conclusion questions
Now, create post-test conclusion questions (optional). These work exactly like the introductory questions – just at the end of the test. They’re great for:
- Getting feedback about the test itself
- Asking behavioural-style questions related to the topic. For example, “How often do you ever shop for groceries online?” or “How easy do you find shopping for groceries online?”
Step 7: edit your thank you page
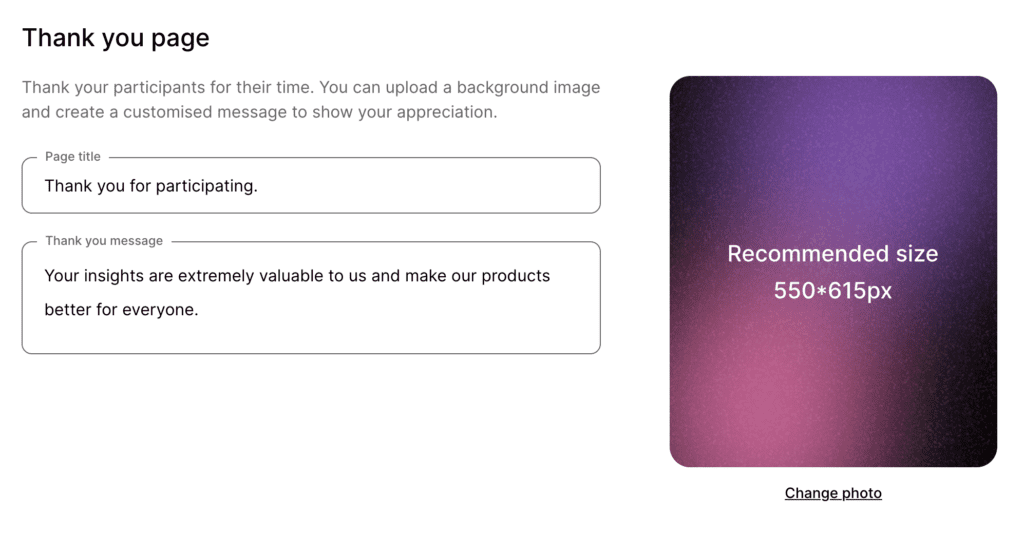
Finish up your tree test by editing your thank you page.
Here you can thank your participants for their time – showing your appreciation.
- Customise your page title, and write a personalised thank you message.
- Add a custom photo.
Step 8: Recruit your participants
Once the test has been built, it’s time to publish it. Start by finding participants…
You can either choose to recruit from the UserQ panel or share the link with your own participants.
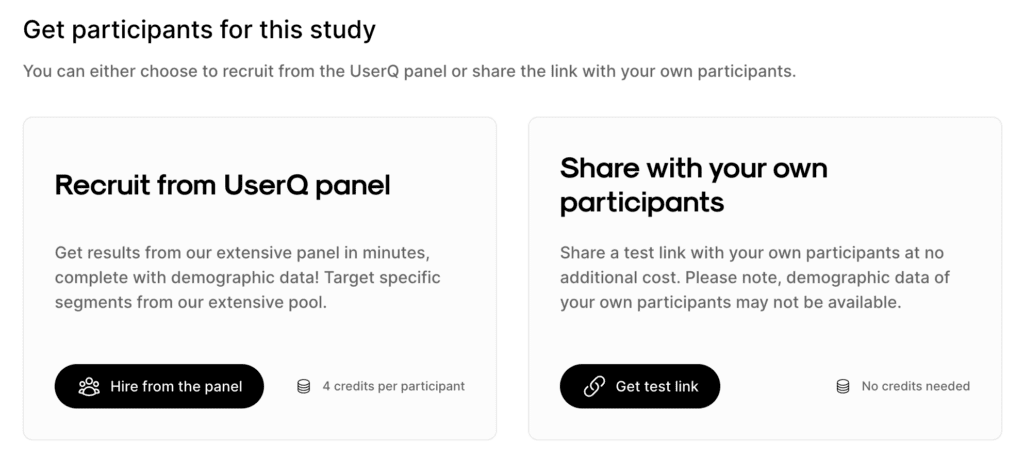
a. Recruit from UserQ panel
If you want to use your own participants, skip to step b.
- Click ‘Hire from the panel’.
- Choose how many participants you want to recruit by using the slider or the input field.
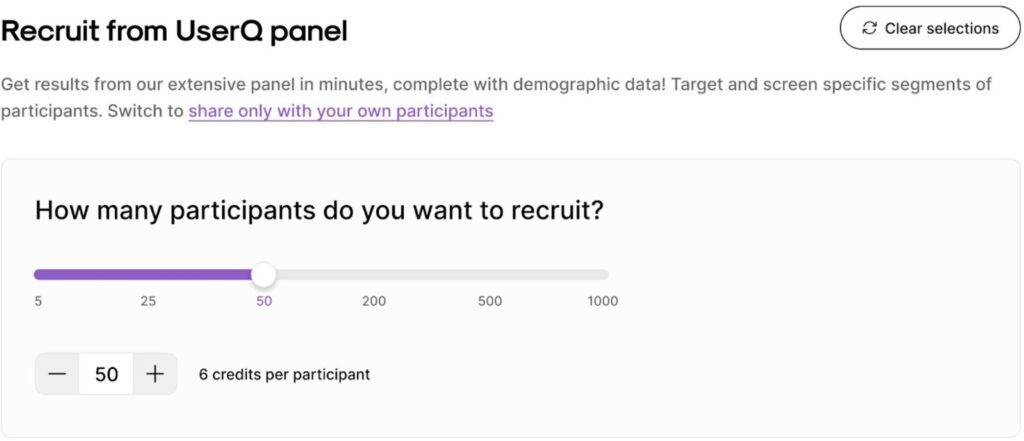
i. Filter by demographics
Next, switch on the demographic filtering feature, where you can target participants from a variety of demographics, including age, gender, nationality, etc. Use our estimated panel size widget (on the right) for real-time information on how many testers we have in our pool, based on your selected demographics. It also provides feedback on your survey’s results speed, ie. how long you’ll have to wait to get all the results.
The broader the panel, the faster the results come in.
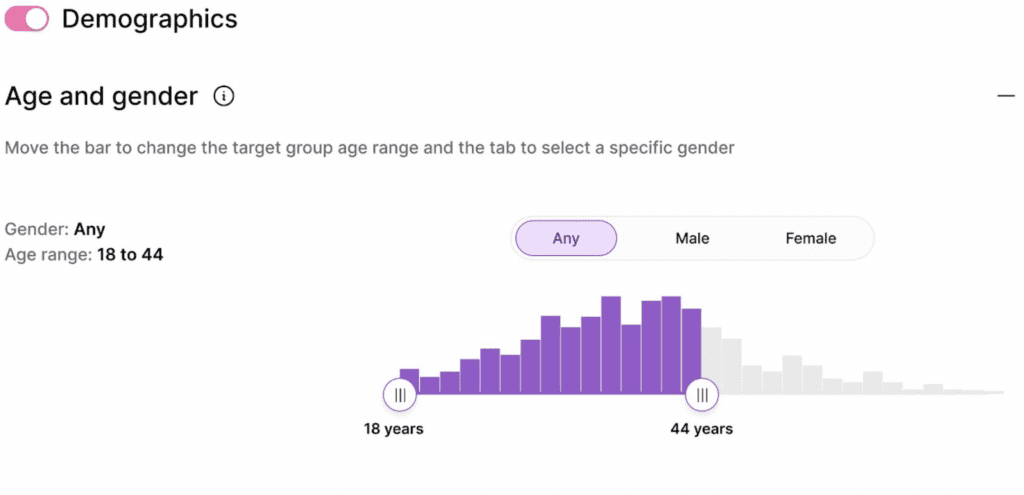
Tip: the recommended minimum number of participants for a tree test is 30.
Bonus tip: customise your participant pool to the target market of your digital product. For example, if you’re creating a tree test for an e-commerce platform that operates solely in the UAE, you’ll likely get the best, most valid results if you select participants who reside in the UAE.
ii. Add screening questions (optional)
Toggle this option, to add screening questions to your study. These questions will appear one-by-one to the tester as ‘pre-test questions’. Their responses will determine whether they are eligible to continue to the study.
You can add up to a maximum of 3, single-choice questions to identify the most suitable participants for your study. Each question can have a maximum of 5 responses and must be classified as either a good fit or no fit.
Good fit = Responses that match your criteria for the study and are eligible to take the test or continue on to the next question (in the case of multiple screener questions). Your credits will be spent only on the “Good fit” participants.
Not fit = Response that are not a good fit for the study and the tester will not be able to access the test.
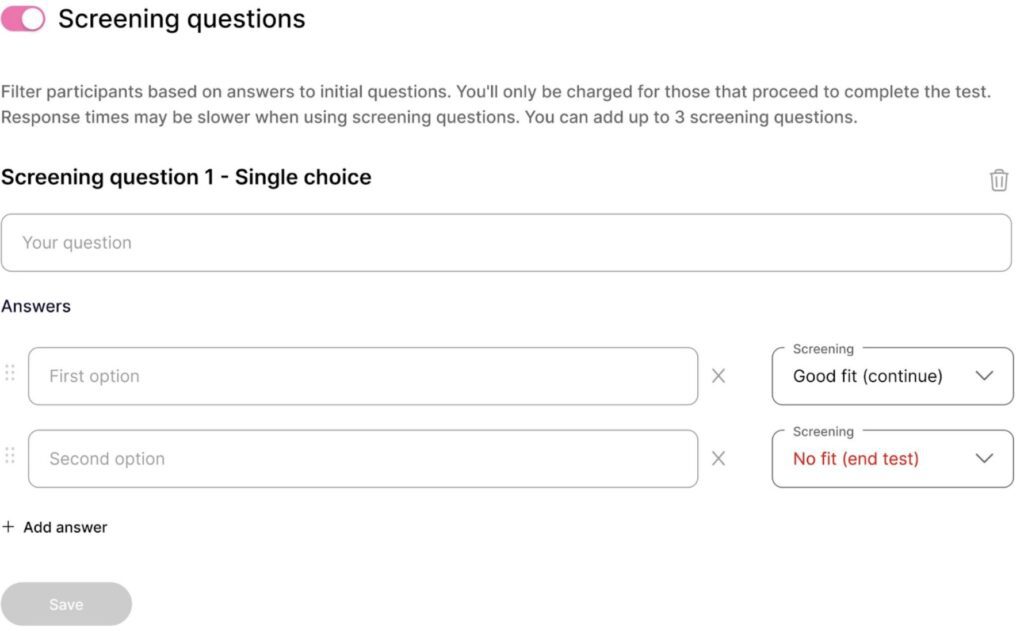
Bonus tip: Identify your target audience by asking them pre-test questions. For example, if you’re creating a survey for a car company operating in the UAE, add screener questions to your study like, “Do you have a valid UAE driver’s license?” or “Do you own a car?”. This ensures that the data collected is relevant to your research and enables you to make informed decisions.
b. Share with your own participants
You can share the link with your own testers panel at no extra cost. However, we recommend recruiting from our UserQ panel due to get full use of our wide-reaching participant demographic data, including age, gender, nationality, residency, confidence with technology, employment status, and household status. By using this data, there will be no need for you to ask demographic questions in the test itself.
Step 9: publish
- Review your order summary (including your total participants and required credits for recruitment and publishing fee).
- In the case of an outstanding credit balance, you will need to process a payment.
- Once everything’s set up how you want it, click ‘Publish’.
Tip: remember to apply a promo code if you’ve got one.
Congratulations, your tree test is now live!
You will get a shareable link for the test, no matter whether you’ve selected a UserQ panel or have chosen your own participants only.
Build your tree test today
We hope our tree testing guide has been helpful. Ready to build yours?
Join as a researcher and start testing your website navigation in just minutes. Get started for free today.
Need a hand with building your tree test? No problem! Send a message to: support@userq.com to get in touch. We’ll be happy to answer any questions you might have.
Related Post

Tree testing guide: Analyse tree
You’ll have access to the results as soon as the tree test is published. The findings of your test show

Card sorting guide: How to
Want to build simple and easy-to-use card sorting tests? You can with UserQ. Our pay-as-you-go user testing platform allows you

Card sorting guide: Analyse card
Once the test is published, you’ll have access to the results straight away. The findings of your card sorting test reveal
Subscribe to our
product newsletter!
Receive emails about UserQ updates, new features,
offers and latest trends.


