🎁 Free 30-day publishing fees on Pay-As-You-GO. Get 15% off when recruiting from the UserQ Panel, with code HELLO15
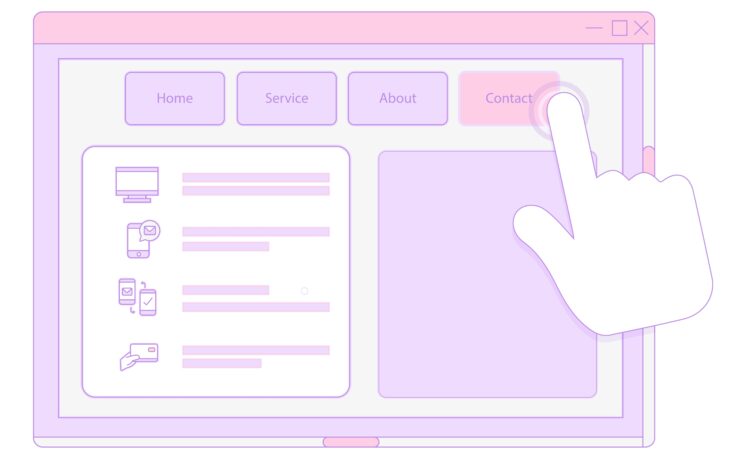
Ready to build a first click test using our UserQ platform? Let’s get you started with this easy-to-follow guide.
What is first click testing?
It’s a user research tool that reveals how easy (or difficult) it is to complete a task on your website. More specifically, whether they’re able to find the information they need on the first click.
By identifying a user’s first impressions of your site and whether they’re clicking in the correct place, you can answer questions like:
- What buttons and other navigational elements are most important? And what ones are irrelevant?
- Are the navigational elements positioned in the right place?
- Does the language you’re using make sense?
What does a first click test involve?
First click testing in UX is about showing participants a screenshot or sketch of your webpage and asking them to complete a task: clicking in a specific area. For example, if you’re an online supermarket brand, you might ask participants to click where they think they’ll find the baked goods.
There are two key metrics measured: where the user clicked on the design and how long it took them to do so.
Wherever the user clicks first and how long it takes to make the click highlights where their attention tends to focus, whether the task was easy to achieve, and whether your website and its elements manage to create a user-friendly experience.
How to create and run a UserQ first click test
Step 1: create a first click test
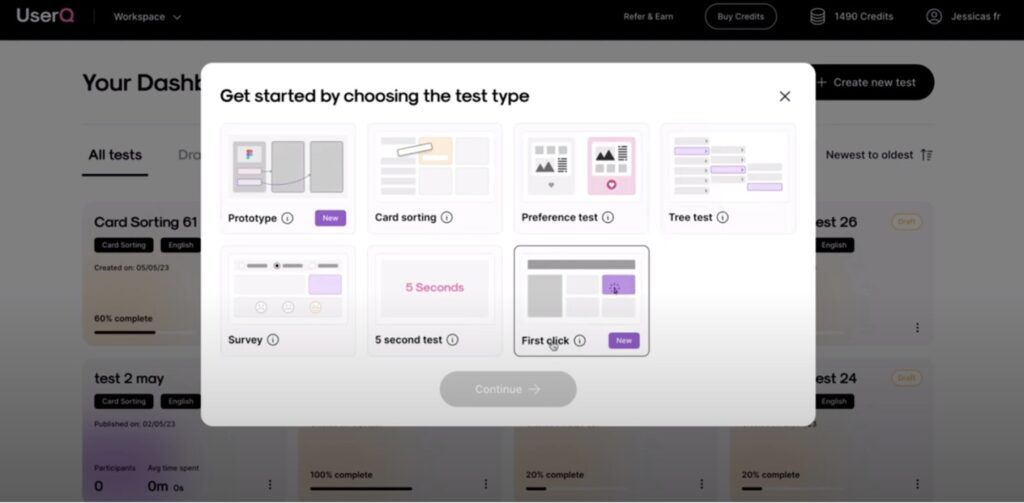
- Login to your UserQ account and you’ll be taken straight to your personal dashboard. Click ‘Create new test’ and then select ‘First click’.
- Choose your test language (either English or Arabic) and give your new test a name. Please note that despite the platform not showing in Arabic, the participant experience will be Arabic-friendly (shown from right to left).
- Select what device type you want to allow users to participate on: mobile only, desktop only, or all devices.
We recommend choosing your selection according to the format of the design you’re going to show participants, ie. if it’s a website homepage you should select desktop only, and if it’s an app interface, select mobile only.
Tip: make sure your test name is suitable and appropriate for participants – it’s what they’ll see too!
Step 2: create a welcome page
Our UserQ platform gives your welcome page a generic title and description by default. However, you can change the pre-populated text and create your own.
Tip: this is your chance to make participants feel at ease by explaining test details before they get started. Let them know what to expect!
Step 3: add introductory questions (optional)
Introductory questions help you gain more insights into who your participants are and what they think about your design.
- Add introductory questions that you want participants to answer before the test begins.
- Choose from four types of questions:
Free text, Single choice, Multiple-choice, and Likert scale.
Step 4: add and build the test tasks
You can add up to five different tasks in each first click test. They require you to input the task description and upload a design file.
a. add the task description
- Write a clear task description that explains the action to be performed on the design being shown.
- For example: ‘Where would you click to change your password?’ or ‘Where would you click to to set up an account?”
b. upload an image file
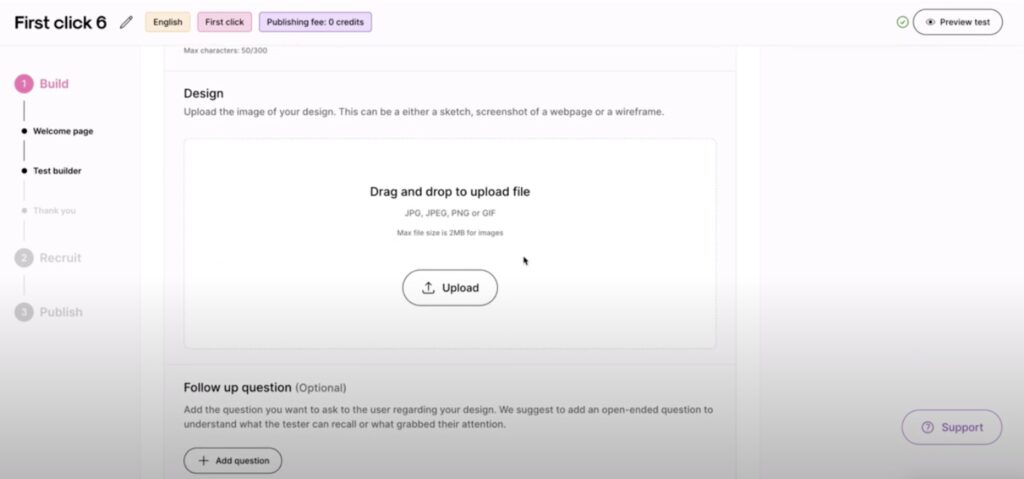
- The design image (JPG, JPEG, PNG, or GIF) you upload depends on what you want to show participants for each task, ie. a sketch or screenshot of a webpage or wireframe.
- To upload the image, drag and drop the file into the box or upload the file using the ‘Upload’ button.
- Change the background colour to any colour that stands out (the default is white).
- Max file size: 2 MB.
Tip: create a better test experience by compressing the image to reduce loading time.
c. add a follow-up question
This is optional, however we recommend you do this to understand more about what testers think about your information architecture and whether they have any general feedback.
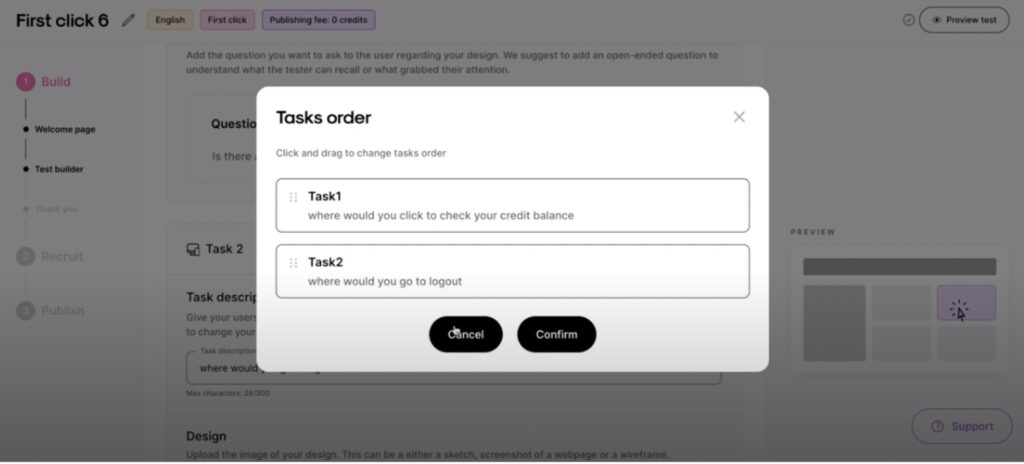
Tip: once you’ve added all the tasks, you can change the order they’re shown to the participants by clicking the ‘Change order’ button and dragging them where you wish.
Step 5: add conclusion questions (optional)
You have the option to add conclusion questions. These work similarly to introductory questions, but they come at the end of your test — not at the start.
The purpose of conclusion questions is to gain feedback on what participants thought about the test, including what they found difficult or what they liked about it.
Step 6: customise your thank you page
Create and customise the thank you page to show participants your appreciation.
- Add the page title and write a short thank you message.
- Add a custom photo.
Tip: remember to preview your test results. Click ‘Preview test’ button in the top right corner. From the participants’ end, the test will go something like this…
- The task description will be set out to the participant and the image will be blurred until they’re ready to begin and click ‘Get started’.
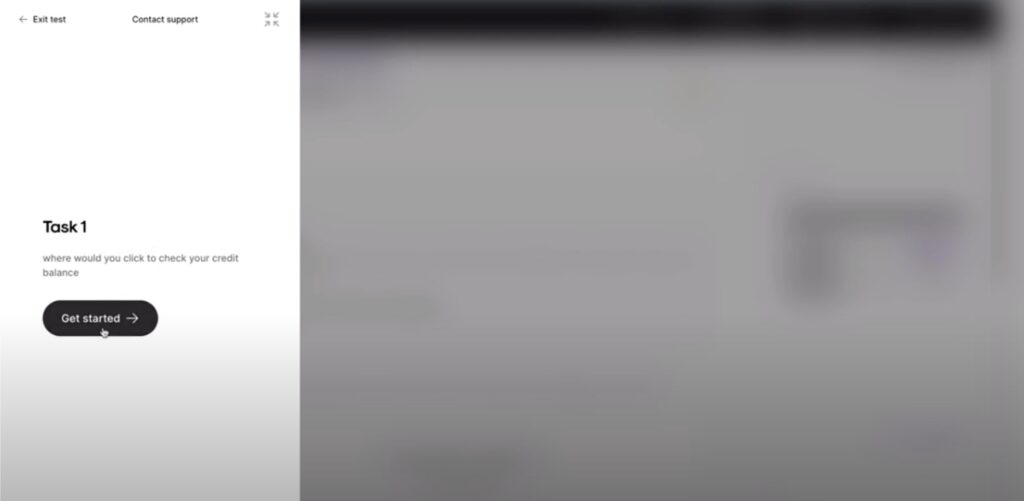
The image will then be shown for them to complete the task. Once they’ve clicked somewhere on the image, they will then be asked to confirm their click. They can choose to select ‘Yes, confirm’ or ‘No, it was by accident’.
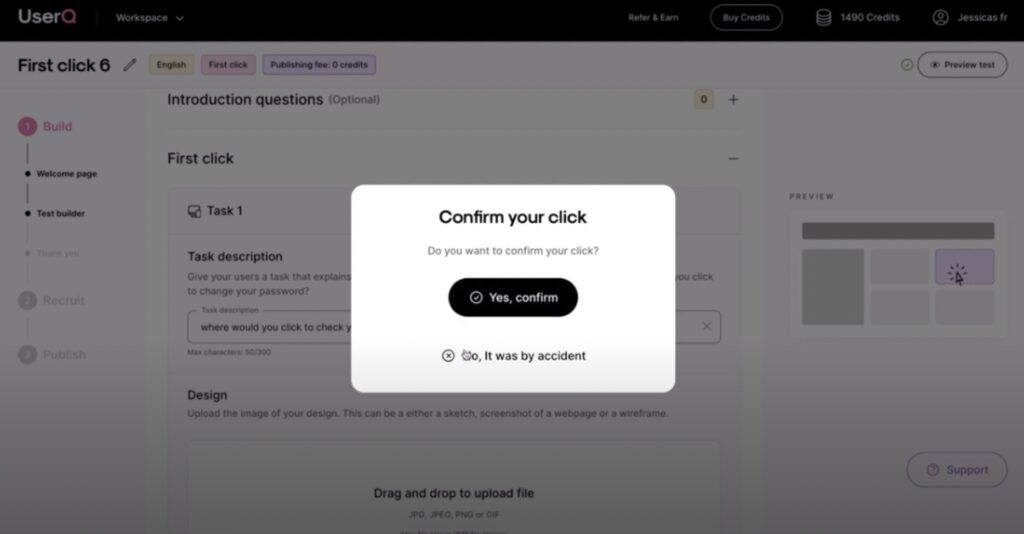
Once confirmed, they’ll be guided to the next task, a follow-up question, or the end of the test (depending on how many tasks you created).
Step 7: recruit participants
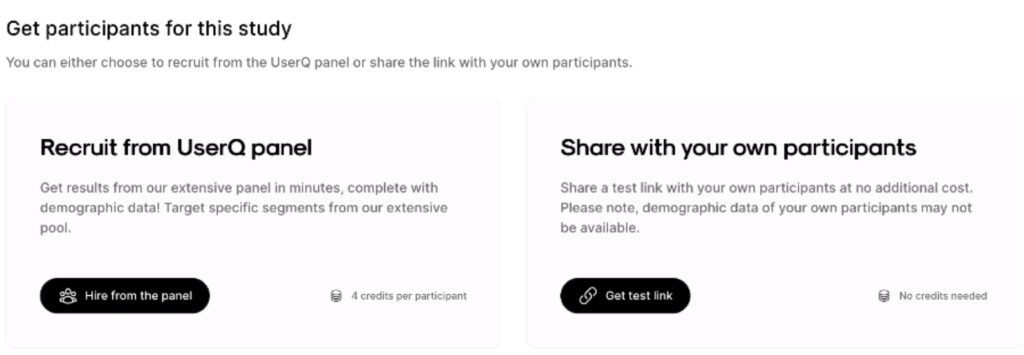
There are two ways you can recruit participants: get participants from the UserQ panel or share the link with your own set of participants.
a. recruit from UserQ panel
If you want to use your own participants, skip to step b.
- Click ‘Hire from the panel’.
- Choose how many participants you want to recruit by using the slider or the input field.
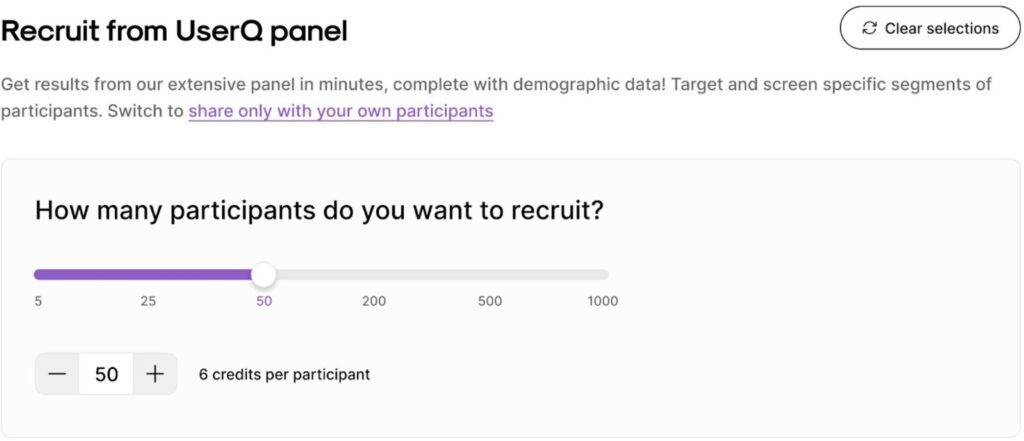
i. Filter by demographics
Next, switch on the demographic filtering feature, where you can target participants from a variety of demographics, including age, gender, nationality, etc. Use our estimated panel size widget (on the right) for real-time information on how many testers we have in our pool, based on your selected demographics. It also provides feedback on your survey’s results speed, ie. how long you’ll have to wait to get all the results.
The broader the panel, the faster the results come in.
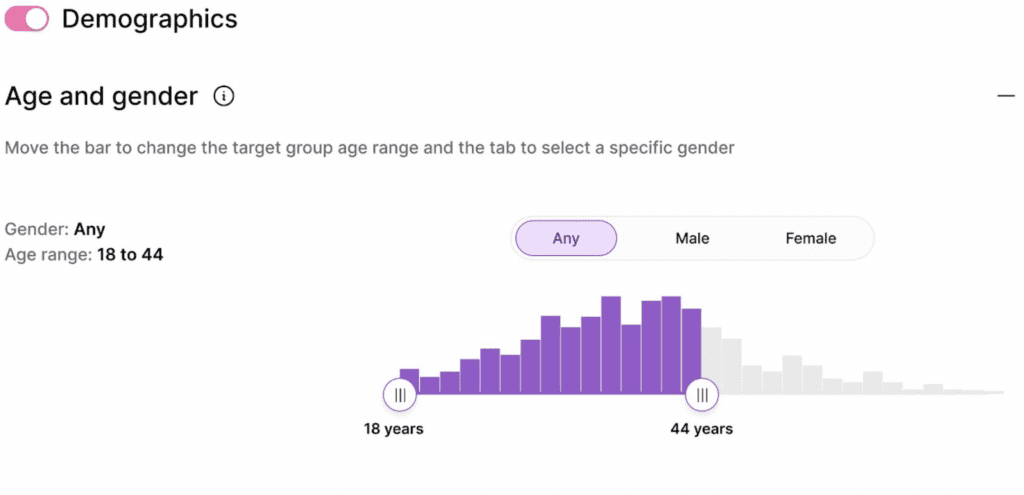
ii. Add screening questions (optional)
Toggle this option, to add screening questions to your study. These questions will appear one-by-one to the tester as ‘pre-test questions’. Their responses will determine whether they are eligible to continue to the study.
You can add up to a maximum of 3, single-choice questions to identify the most suitable participants for your study. Each question can have a maximum of 5 responses and must be classified as either a good fit or no fit.
Good fit = Responses that match your criteria for the study and are eligible to take the test or continue on to the next question (in the case of multiple screener questions). Your credits will be spent only on the “Good fit” participants.
Not fit = Response that are not a good fit for the study and the tester will not be able to access the test.
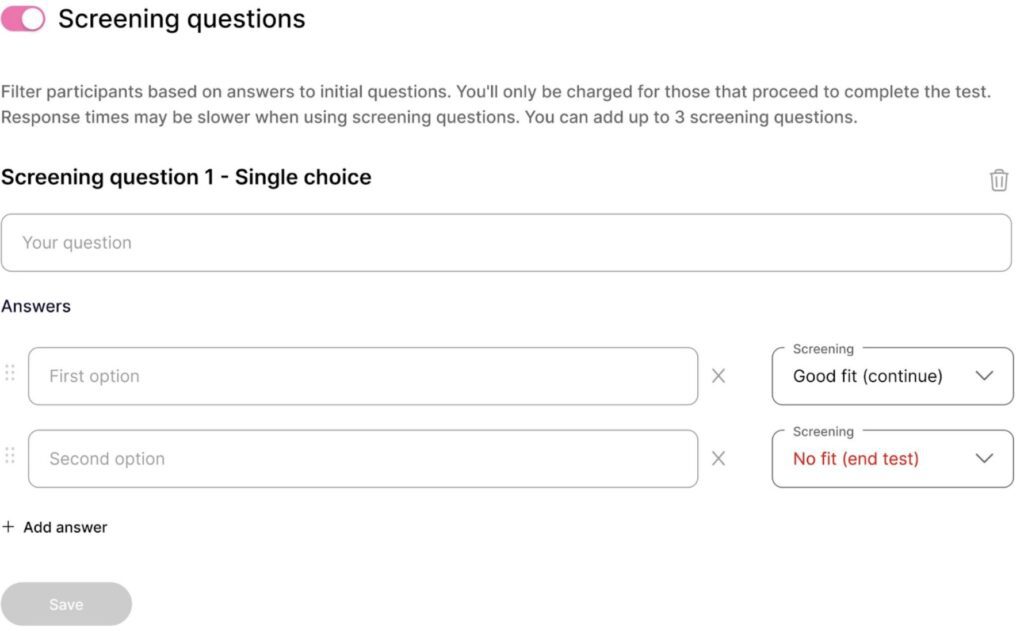
Bonus tip: Identify your target audience by asking them pre-test questions. For example, if you’re creating a survey for a car company operating in the UAE, add screener questions to your study like, “Do you have a valid UAE driver’s license?” or “Do you own a car?”. This ensures that the data collected is relevant to your research and enables you to make informed decisions.
b. share with your own set of participants
Sharing the first click test with your own set of participants via a shareable link comes with no extra cost.
We highly recommend using our UserQ panel to recruit participants because you can use our participant demographic data to target your key demographic. It also means you will not have to add demographic questions to the test.
Step 8: publish the first click sorting test
- Review your order summary
- If you have an outstanding credit balance you’ll need to process a payment.
- Once you’re happy with everything, click ‘Publish’.
Please note all researchers get a shareable link, whether you’re using the UserQ panel or have chosen to use your own participants.
Build your first click test
Use our UserQ platform as a researcher. Get started for free today.
Need some advice or support when building your first click test? Send us a message to: support@userq.com. We’re always ready to answer any questions or queries you have about UX first click testing.
Related Post

Tree testing guide: How to
Want to build a fully functional tree test the easy way? Here at UserQ, we’ve got the tools you need
Tree testing guide: Analyse tree
You’ll have access to the results as soon as the tree test is published. The findings of your test show

Card sorting guide: How to
Want to build simple and easy-to-use card sorting tests? You can with UserQ. Our pay-as-you-go user testing platform allows you
Subscribe to our
product newsletter!
Receive emails about UserQ updates, new features,
offers and latest trends.


